
Client Portal Manual
A step-by-step guide to registering, logging in, navigating the dashboard, and applying for visas
Version 1.0 — March 2026
A step-by-step guide to registering, logging in, navigating the dashboard, and applying for visas
Version 1.0 — March 2026
The Future Gate Client Portal is a secure online platform where you can:
Invitation Code Required: To register for the portal, you need an invitation code provided by Future Gate. This code links your account to your company. Please contact your Future Gate representative if you have not received one.
Follow these steps to create your Client Portal account:
login.html on the Future Gate website, or click the "Client Login" link in the top bar of any page.
| Field | Required | Description |
|---|---|---|
| Full Name | Yes | Your full name as it appears on official documents |
| Email Address | Yes | Your business email address (will be used for login) |
| Password | Yes | Minimum 8 characters. Choose a strong password |
| Phone Number | Optional | Your contact phone number |
| Invitation Code | Yes | The code provided by Future Gate (e.g. FG-ABC123). This links your account to your company. |
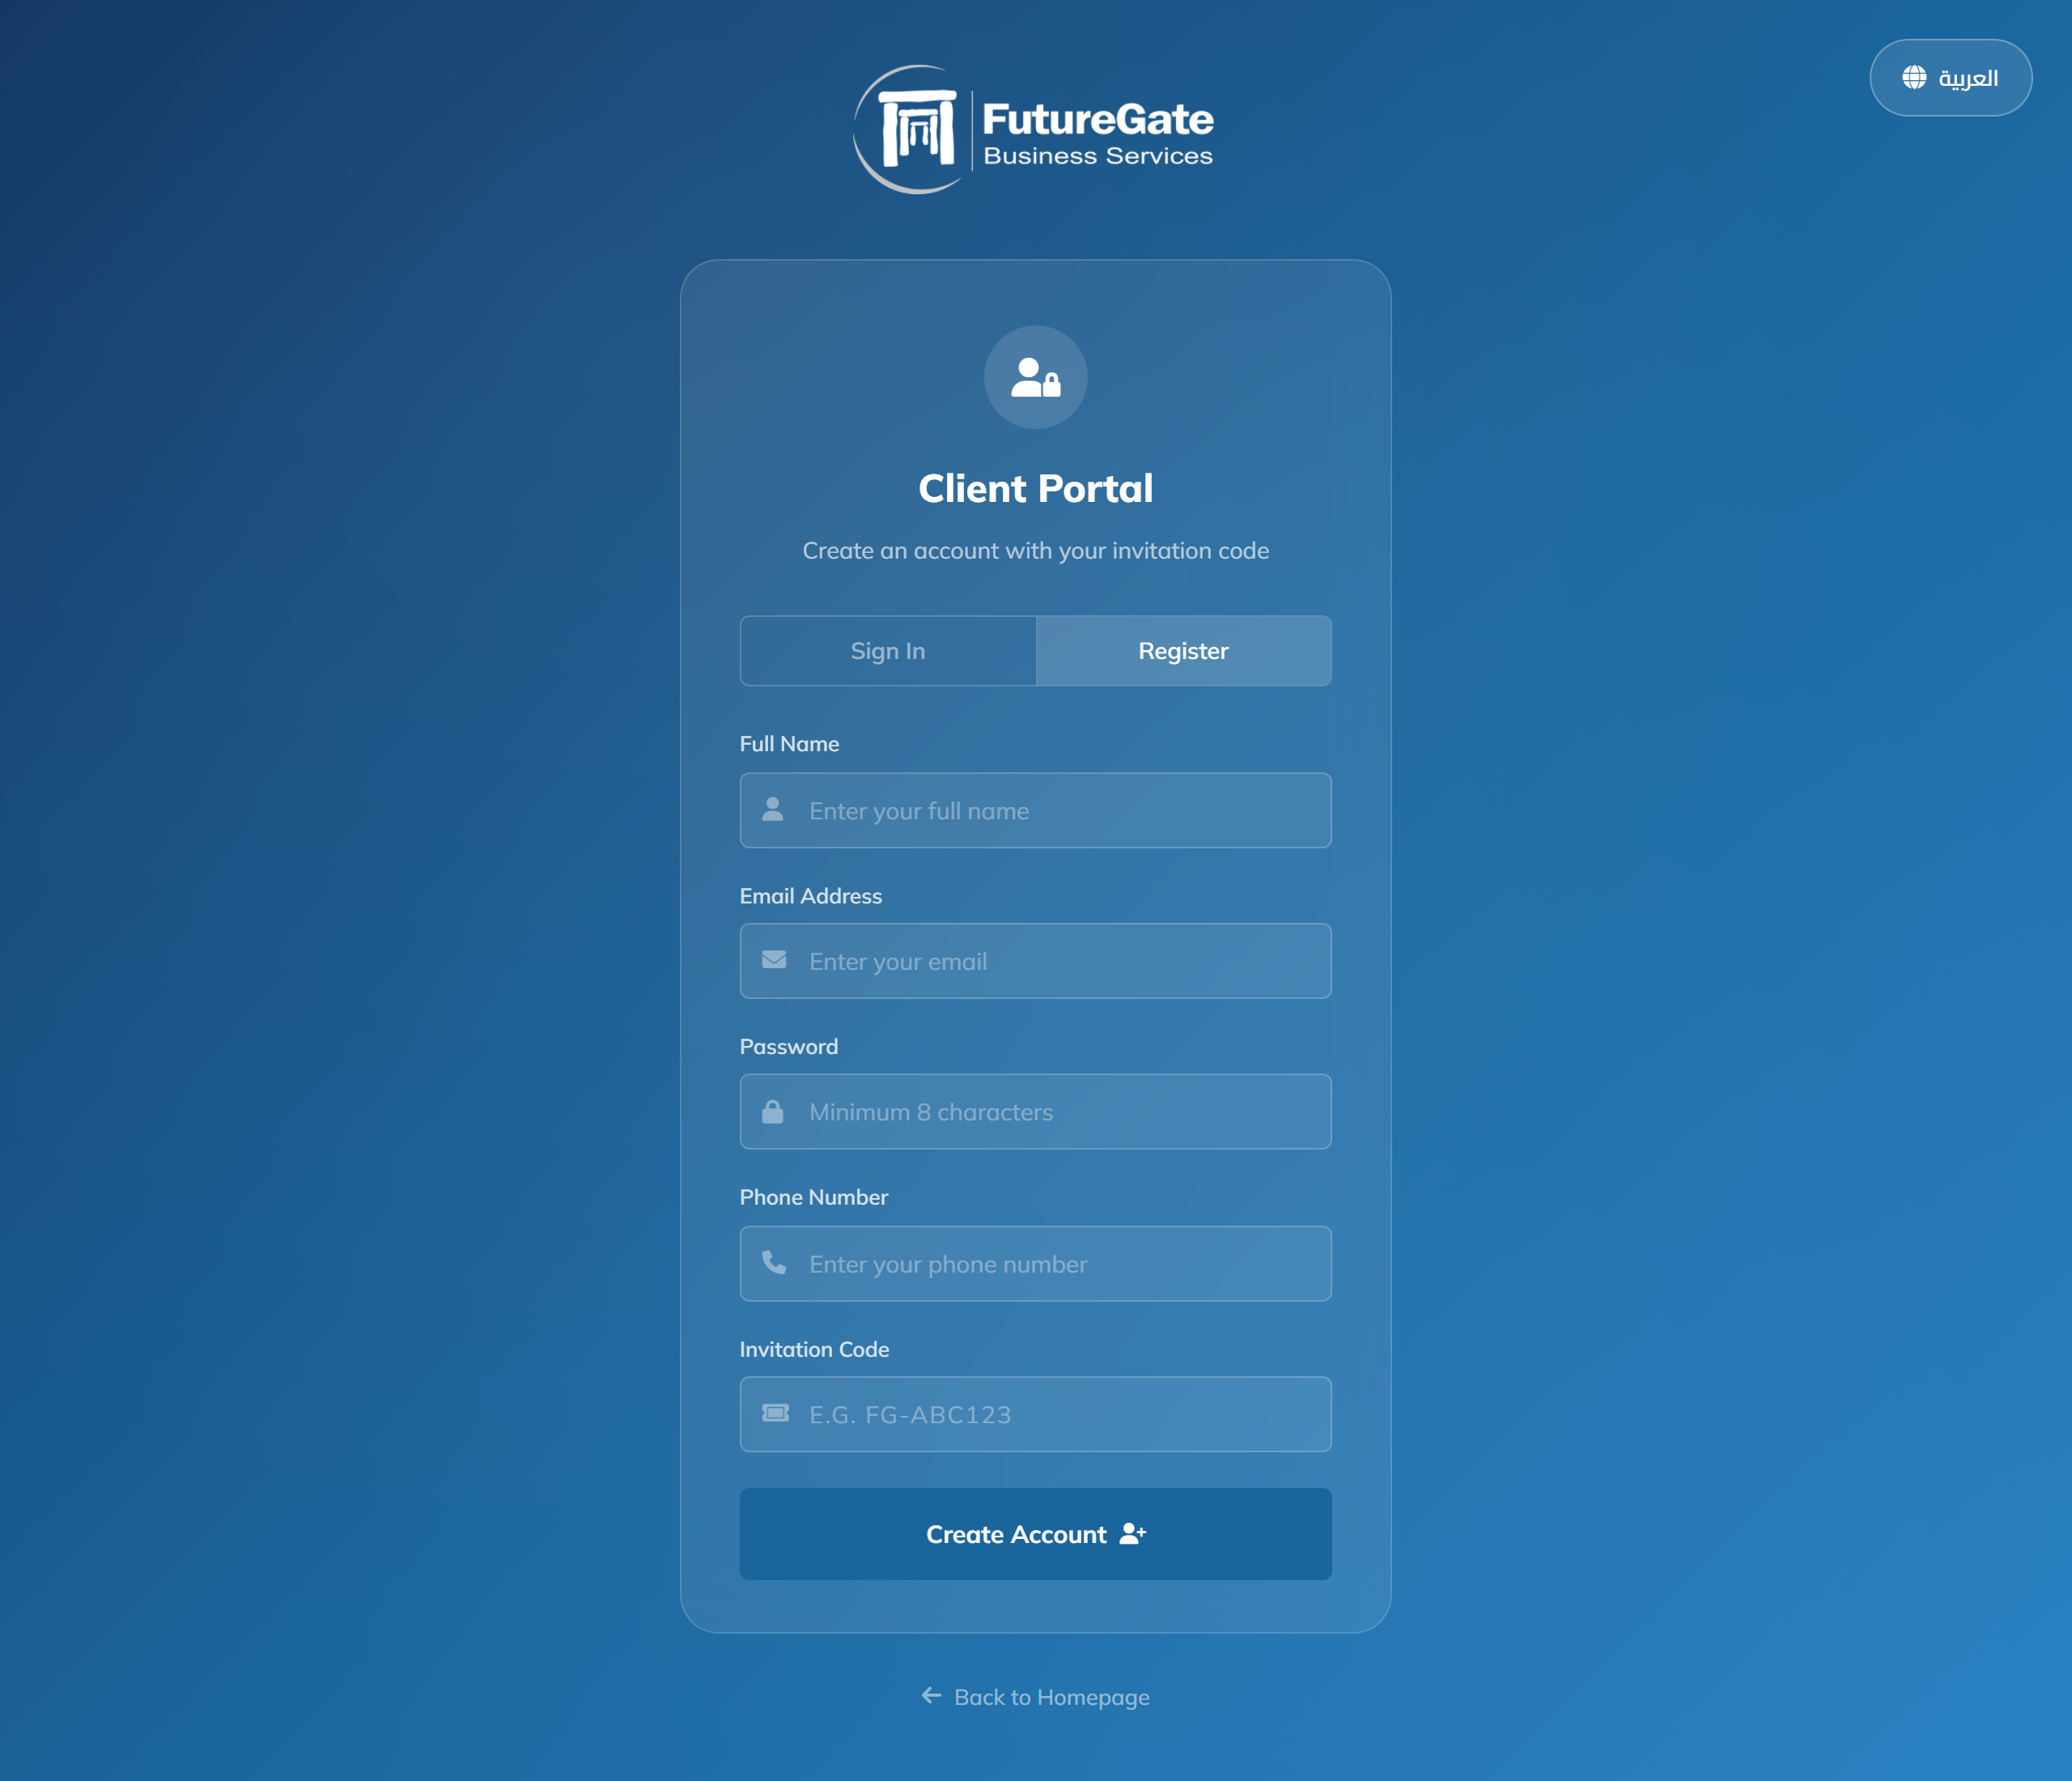
Important: You cannot register without a valid invitation code. If you receive an error, verify that you have entered the code correctly (it is case-insensitive). Contact Future Gate if your code is not working.
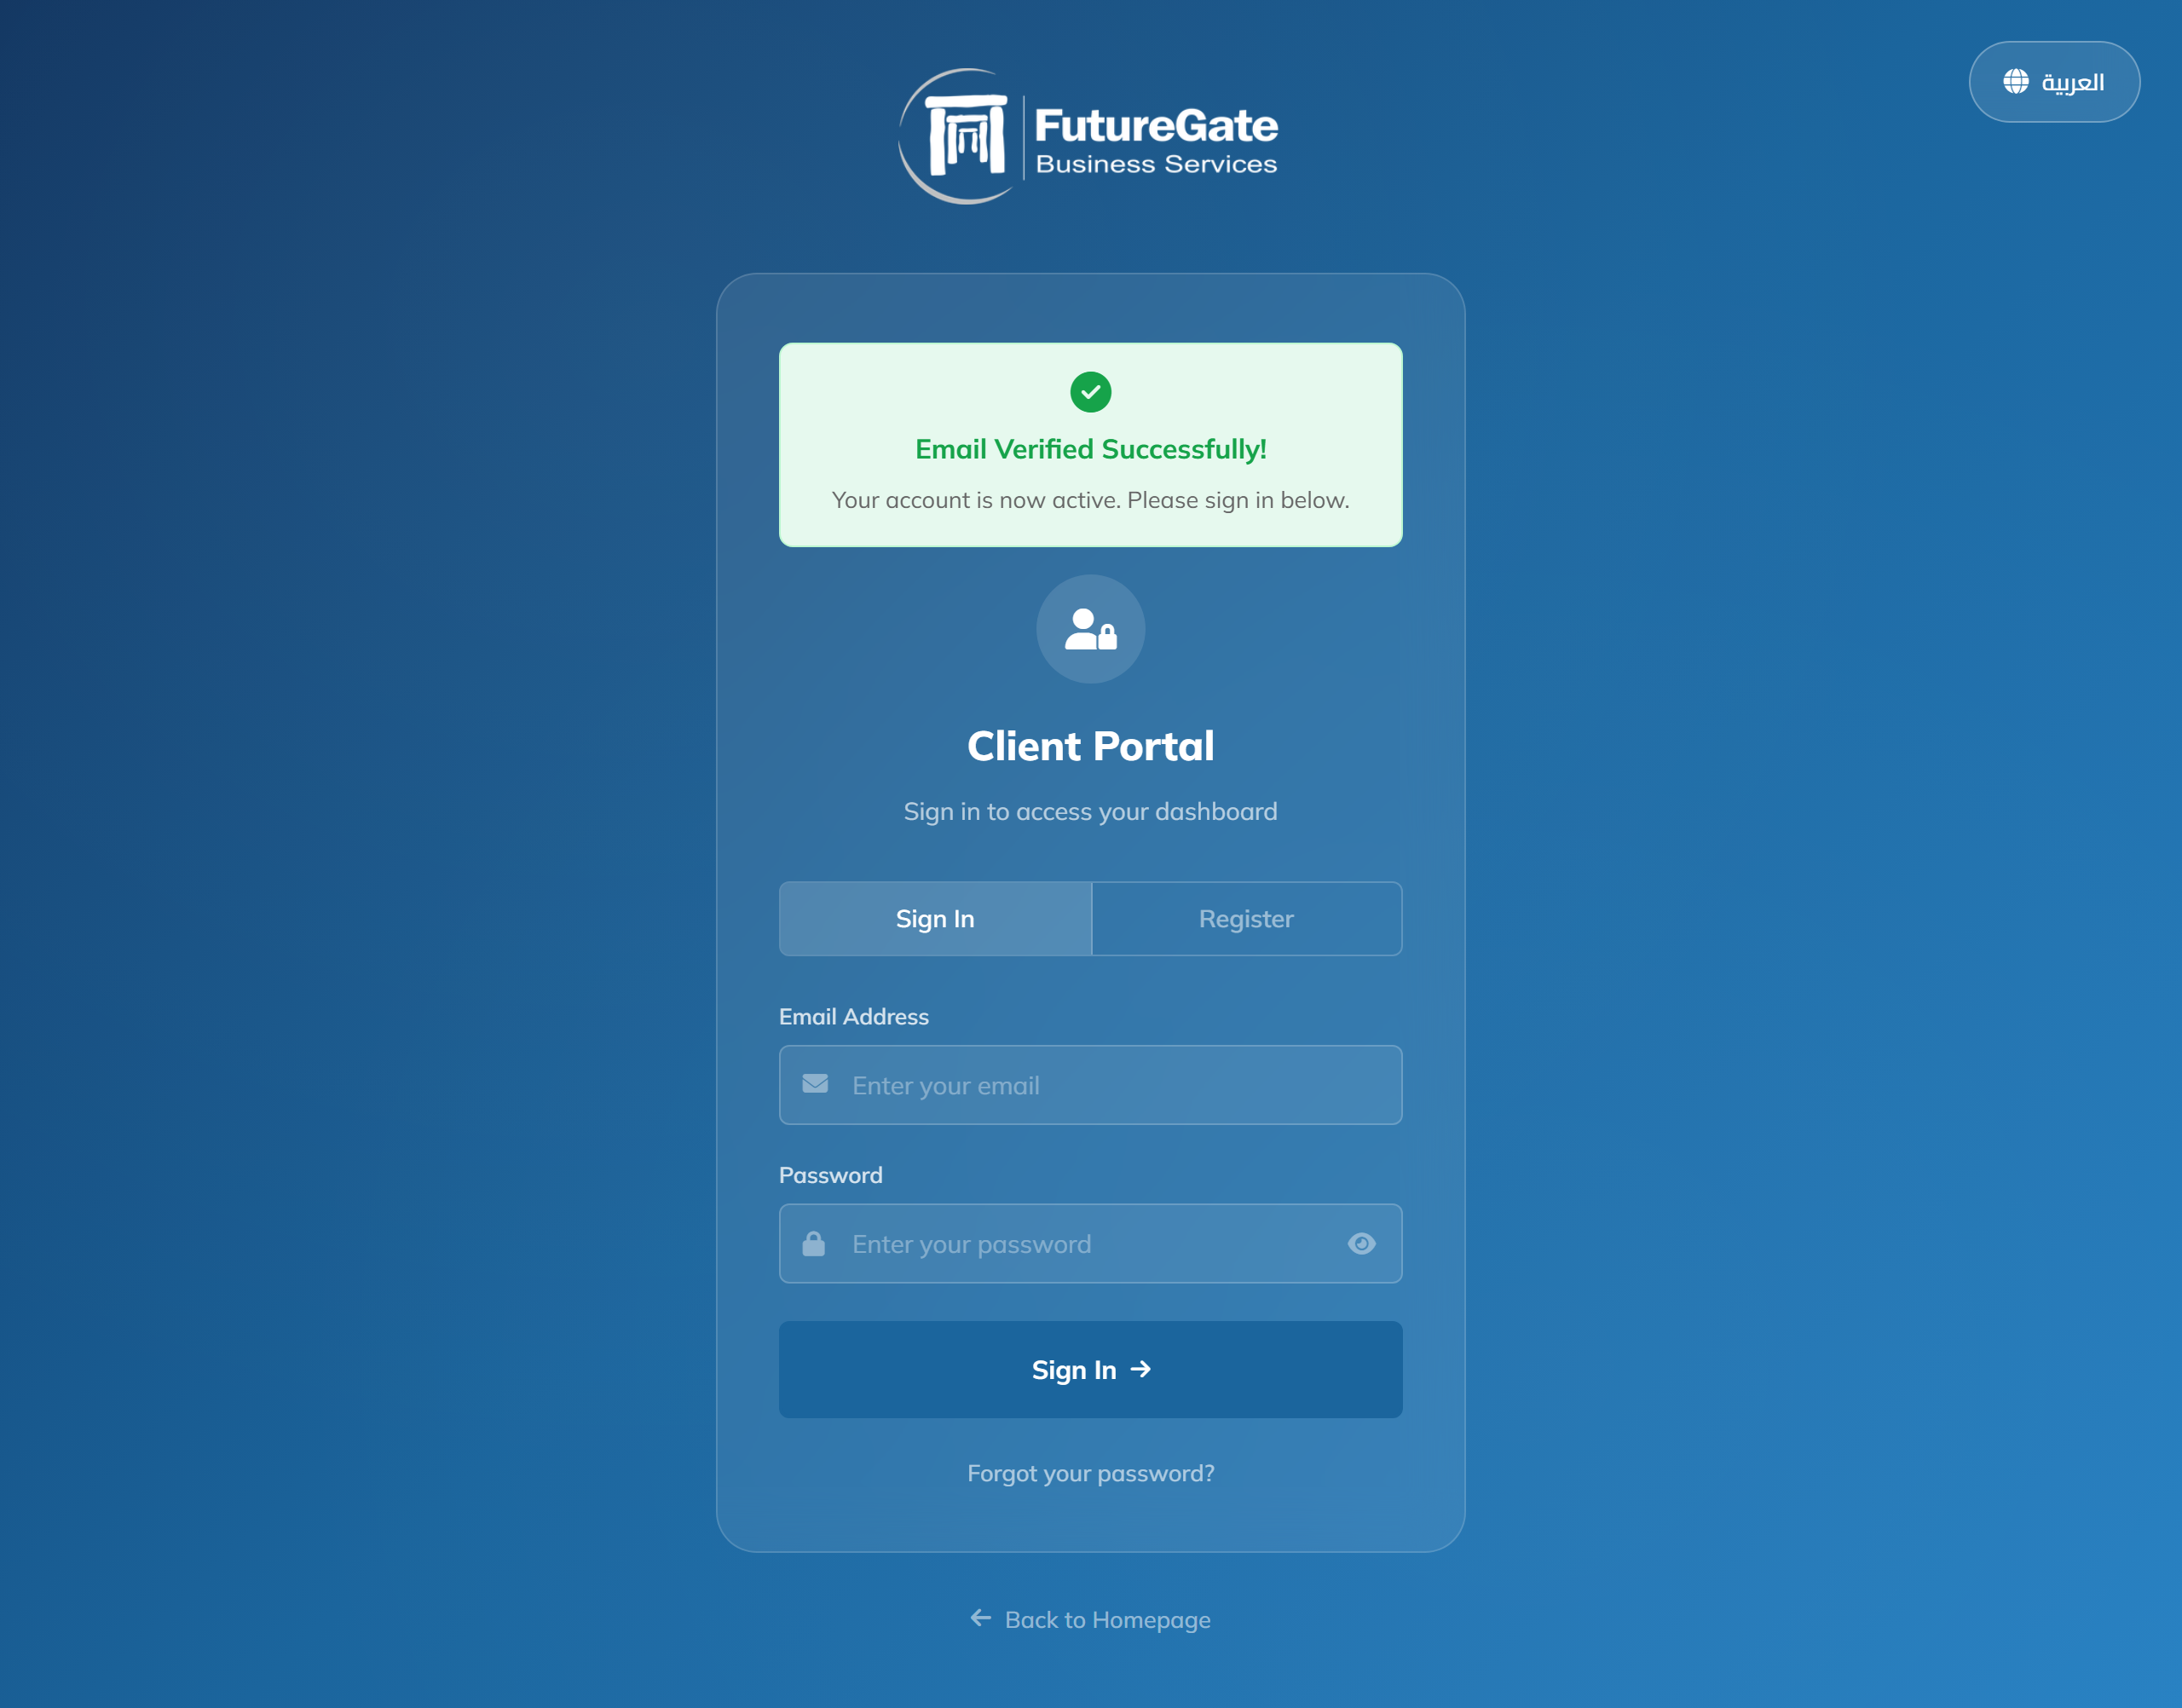
After registering, you must verify your email address before you can sign in.
If you don't see the email, check your Spam or Junk folder. The email may take a few minutes to arrive.
Once your account is verified, you can sign in to access your dashboard.
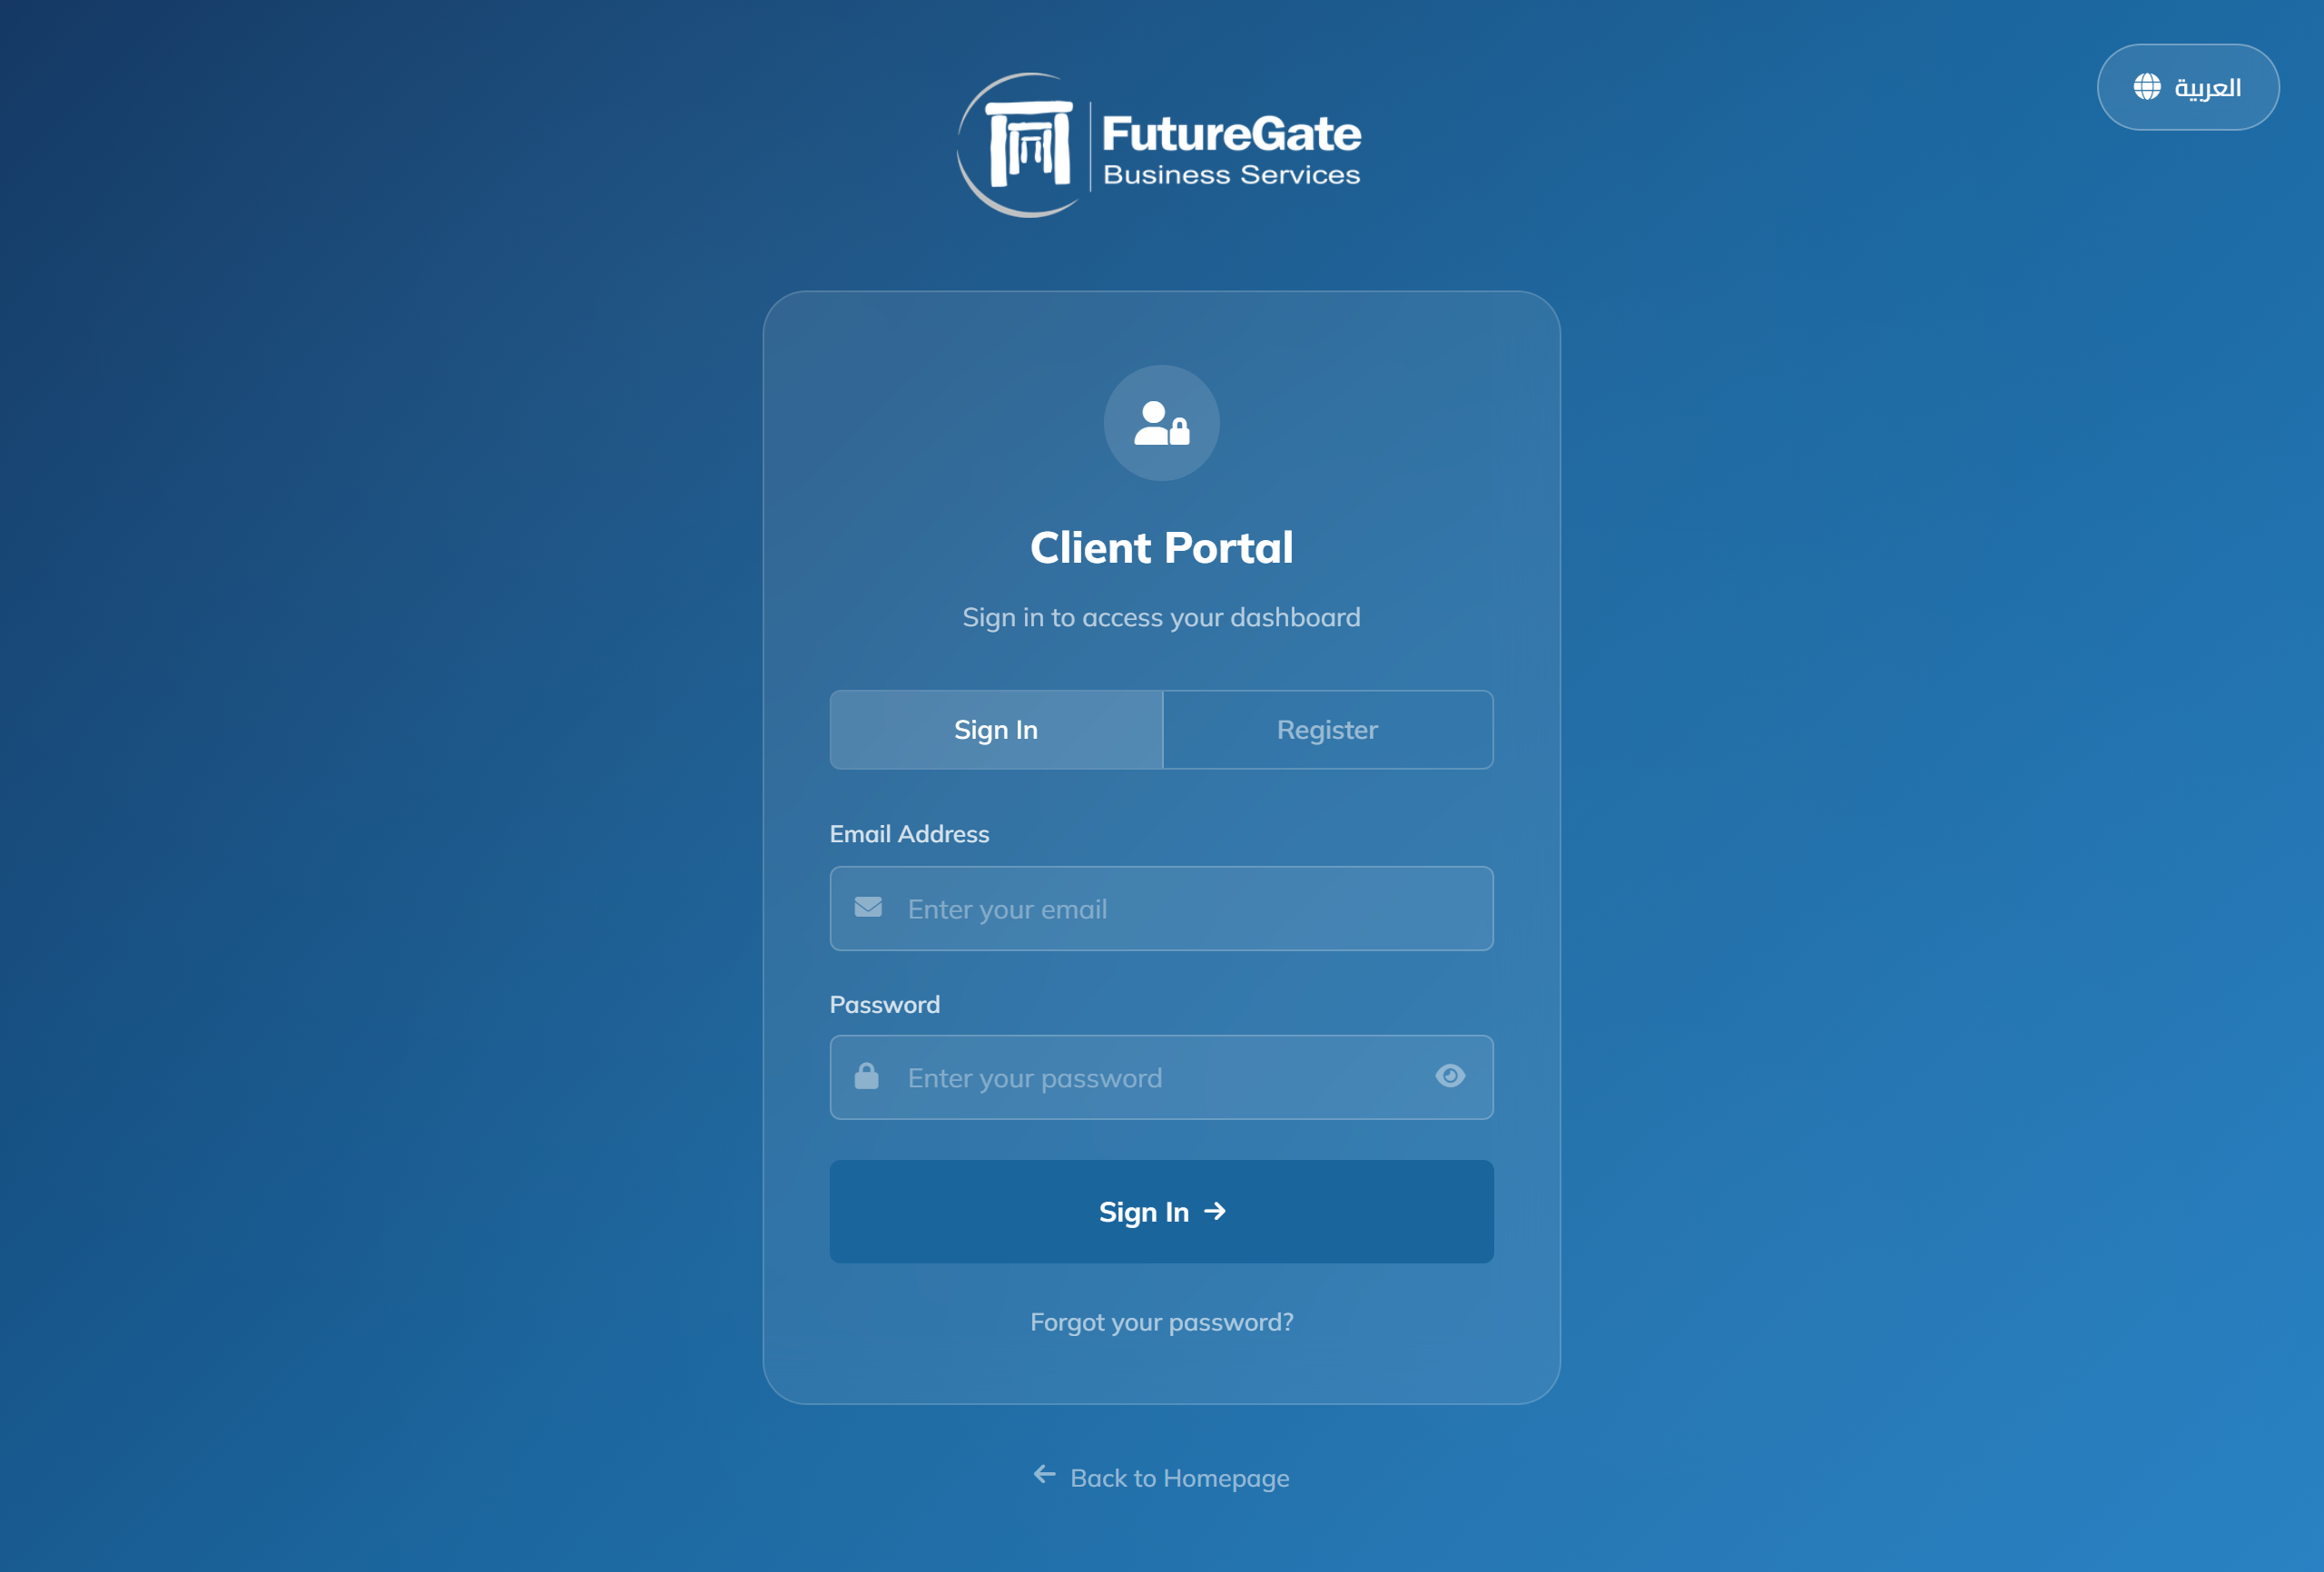
Tip: You can click the eye icon () next to the password field to show/hide your password while typing.
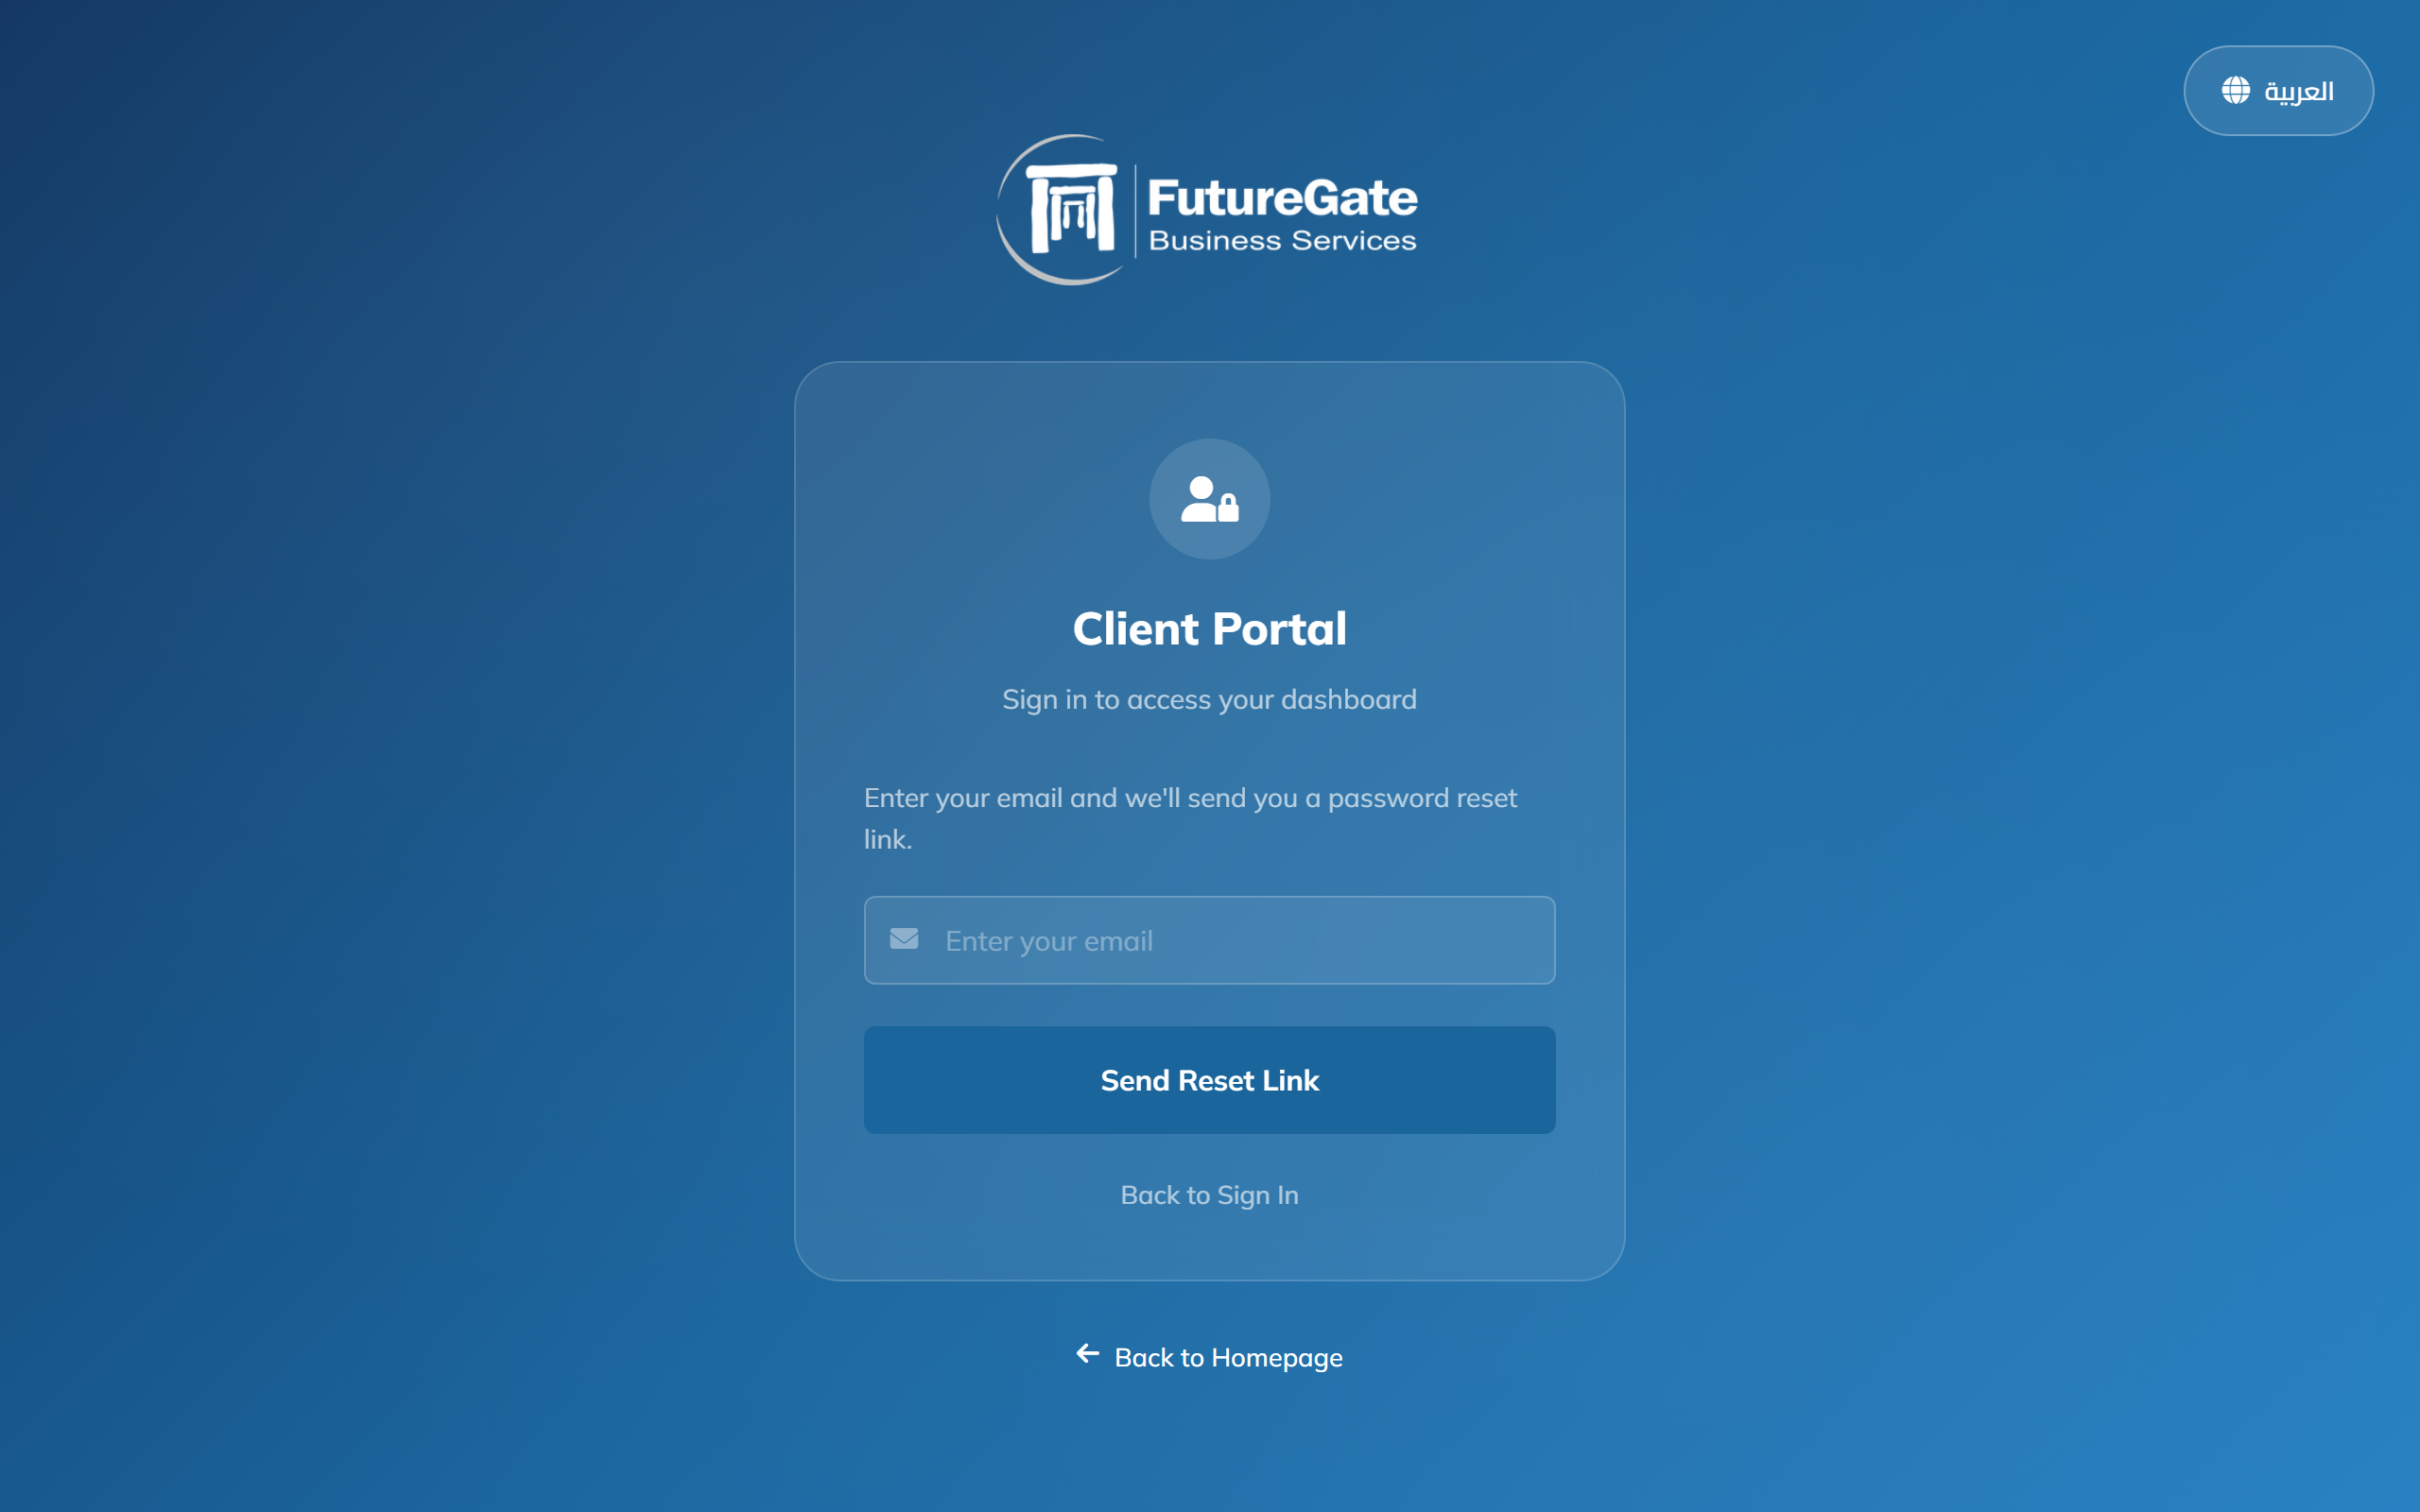
If you've forgotten your password, you can reset it easily.
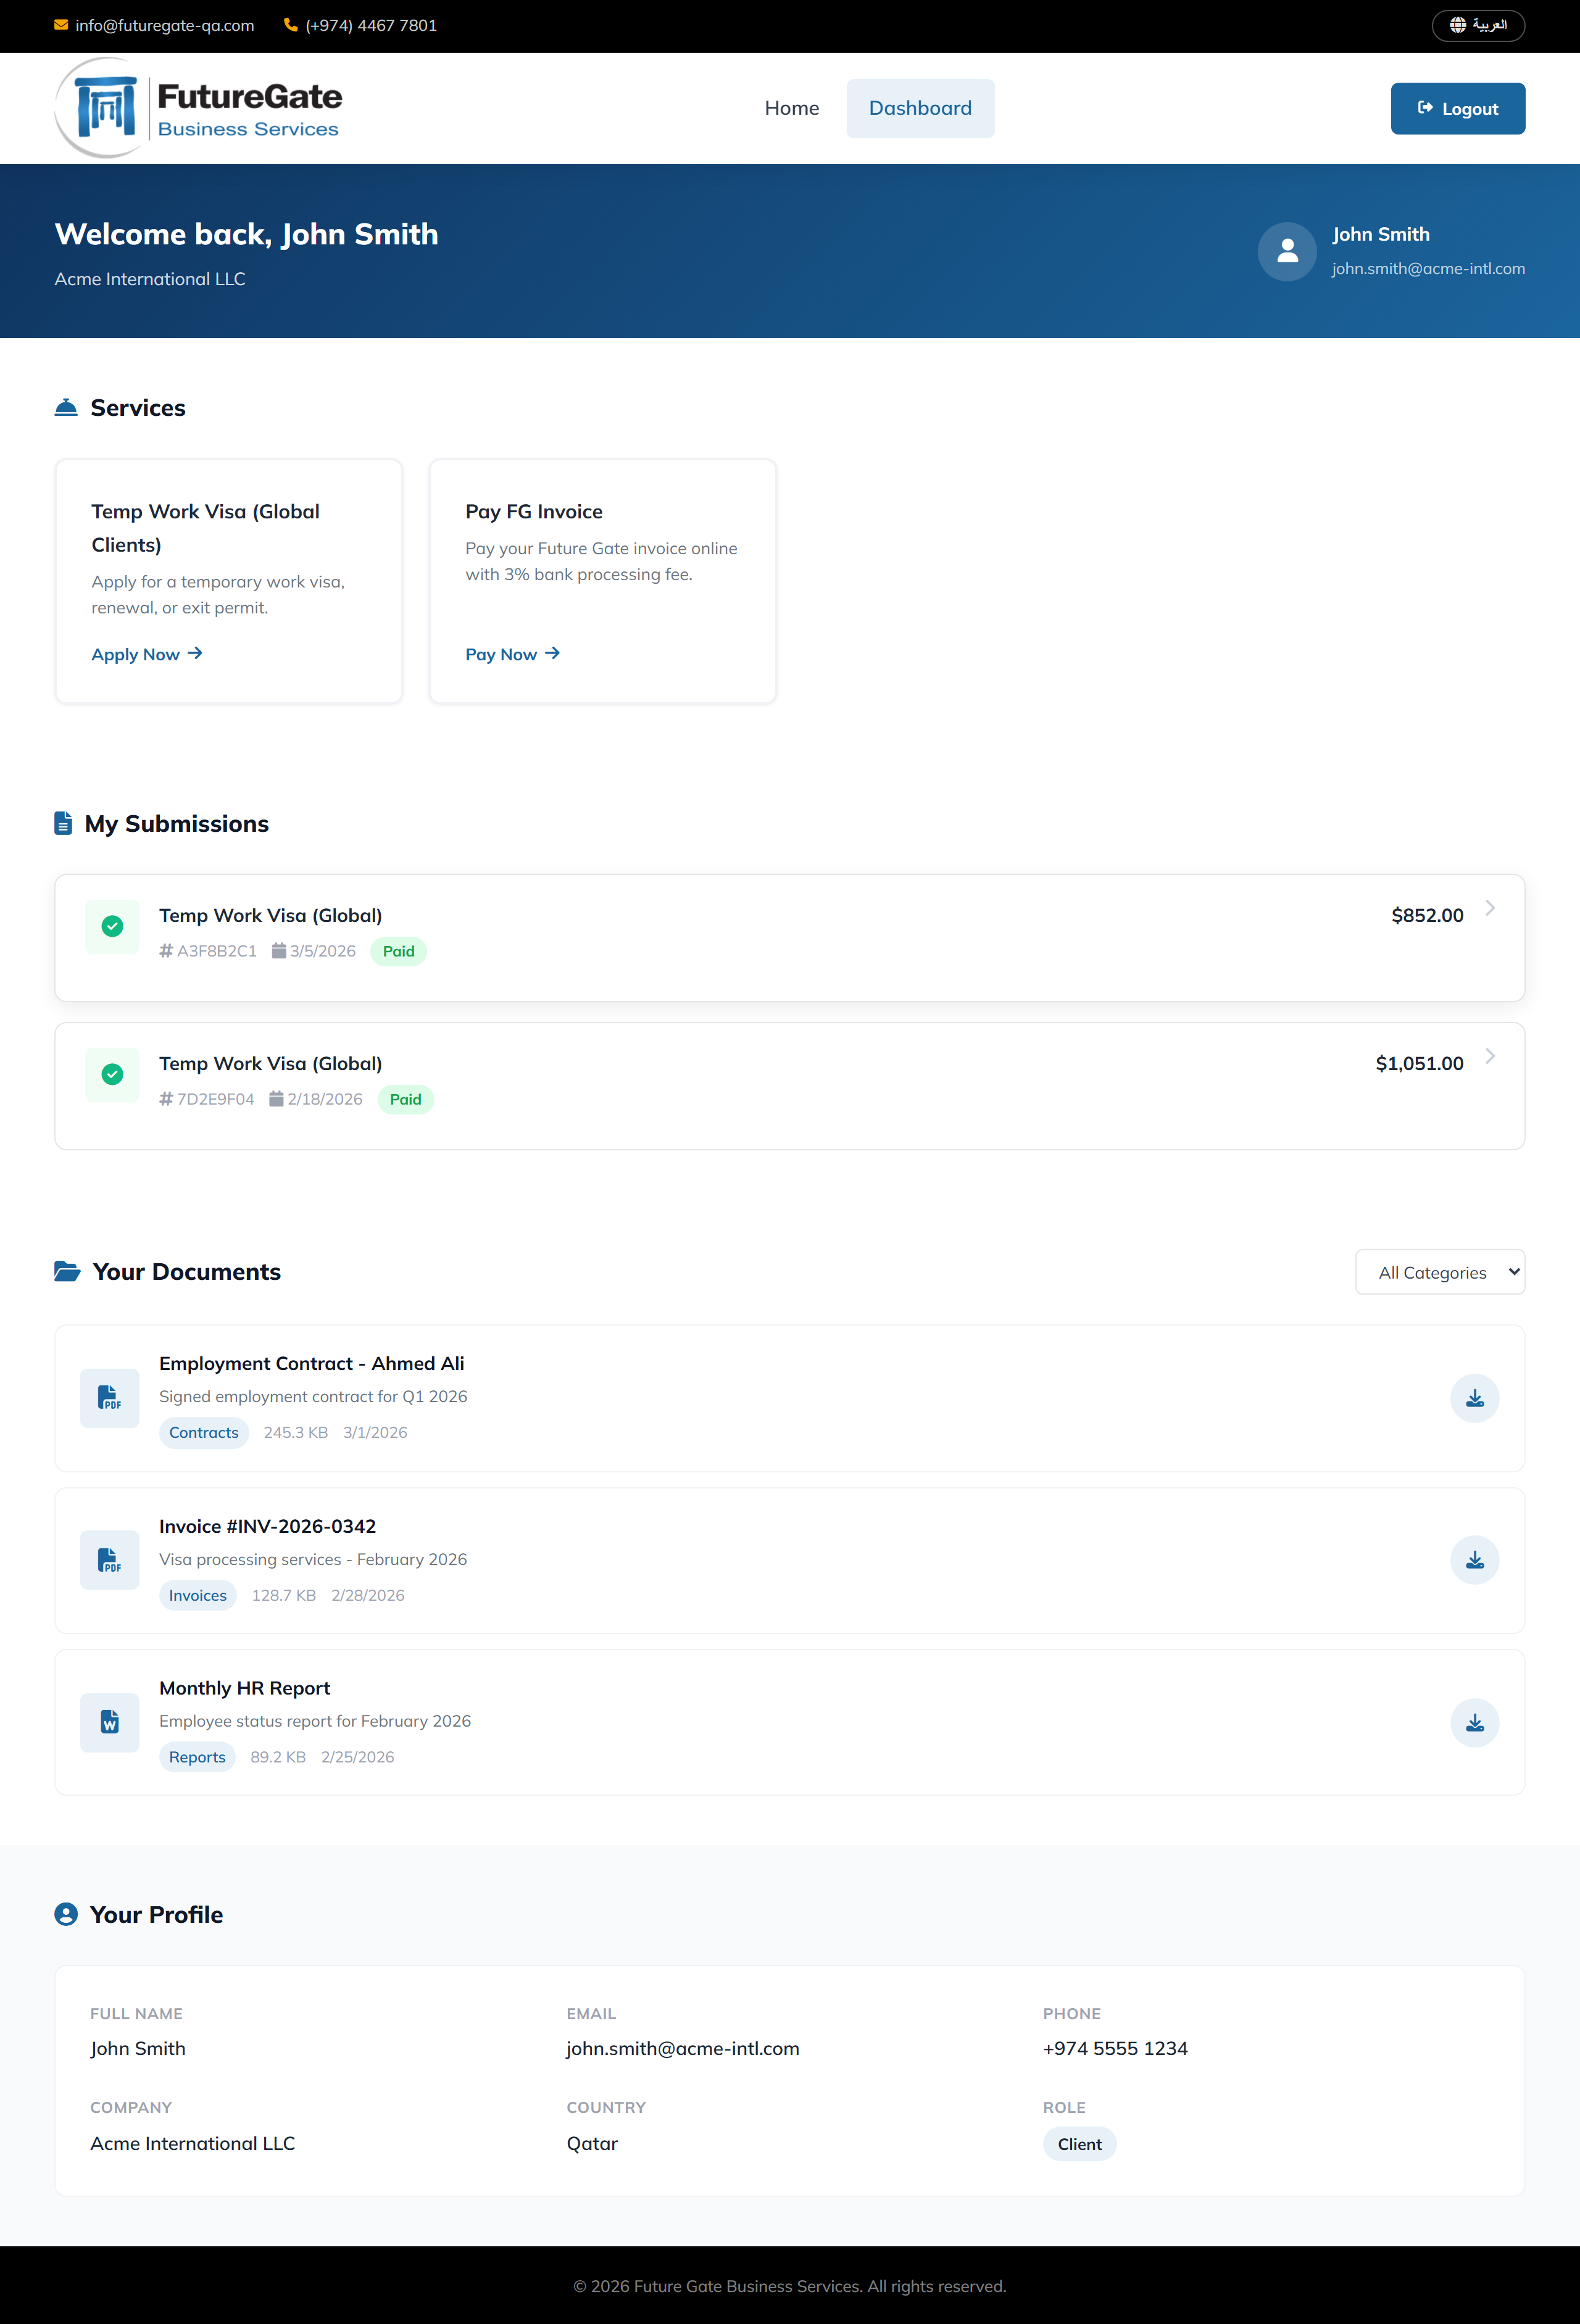
After signing in, you will land on your Dashboard. The dashboard is divided into several sections:
At the top, you'll see a personalized welcome message with your name, company name, and avatar.
Below the welcome area, you'll see cards for the services available to you based on your permissions. These may include visa applications and invoice payments. Click any service card to get started.
This section shows all your completed and paid form submissions. You can click on any submission to see its full details, including the form data you entered, attached files, and fee breakdown.
Documents assigned to your company appear here. You can filter them by category (Contracts, Invoices, Reports, Legal, HR, General) and download them if you have download permissions.
At the bottom of the dashboard, you can see your profile details including name, email, phone, company, country, and role.
Depending on your permissions, you may see one or more of the following service cards on your dashboard:
| Service | Permission Required | Description |
|---|---|---|
| Temp Work Visa (Nokia) | form_visa_nokia | Visa applications for Nokia employees |
| Temp Work Visa (Global Clients) | form_visa_global | Visa applications for all other clients |
| Temp Work Visa (Global Partners) | form_visa_partners | Partner-rate visa applications |
| Pay FG Invoice | form_invoice_payment | Pay a Future Gate invoice online (3% processing fee) |
If you don't see any services, it means your administrator has not yet granted you the relevant permissions. Contact your Future Gate representative to request access.
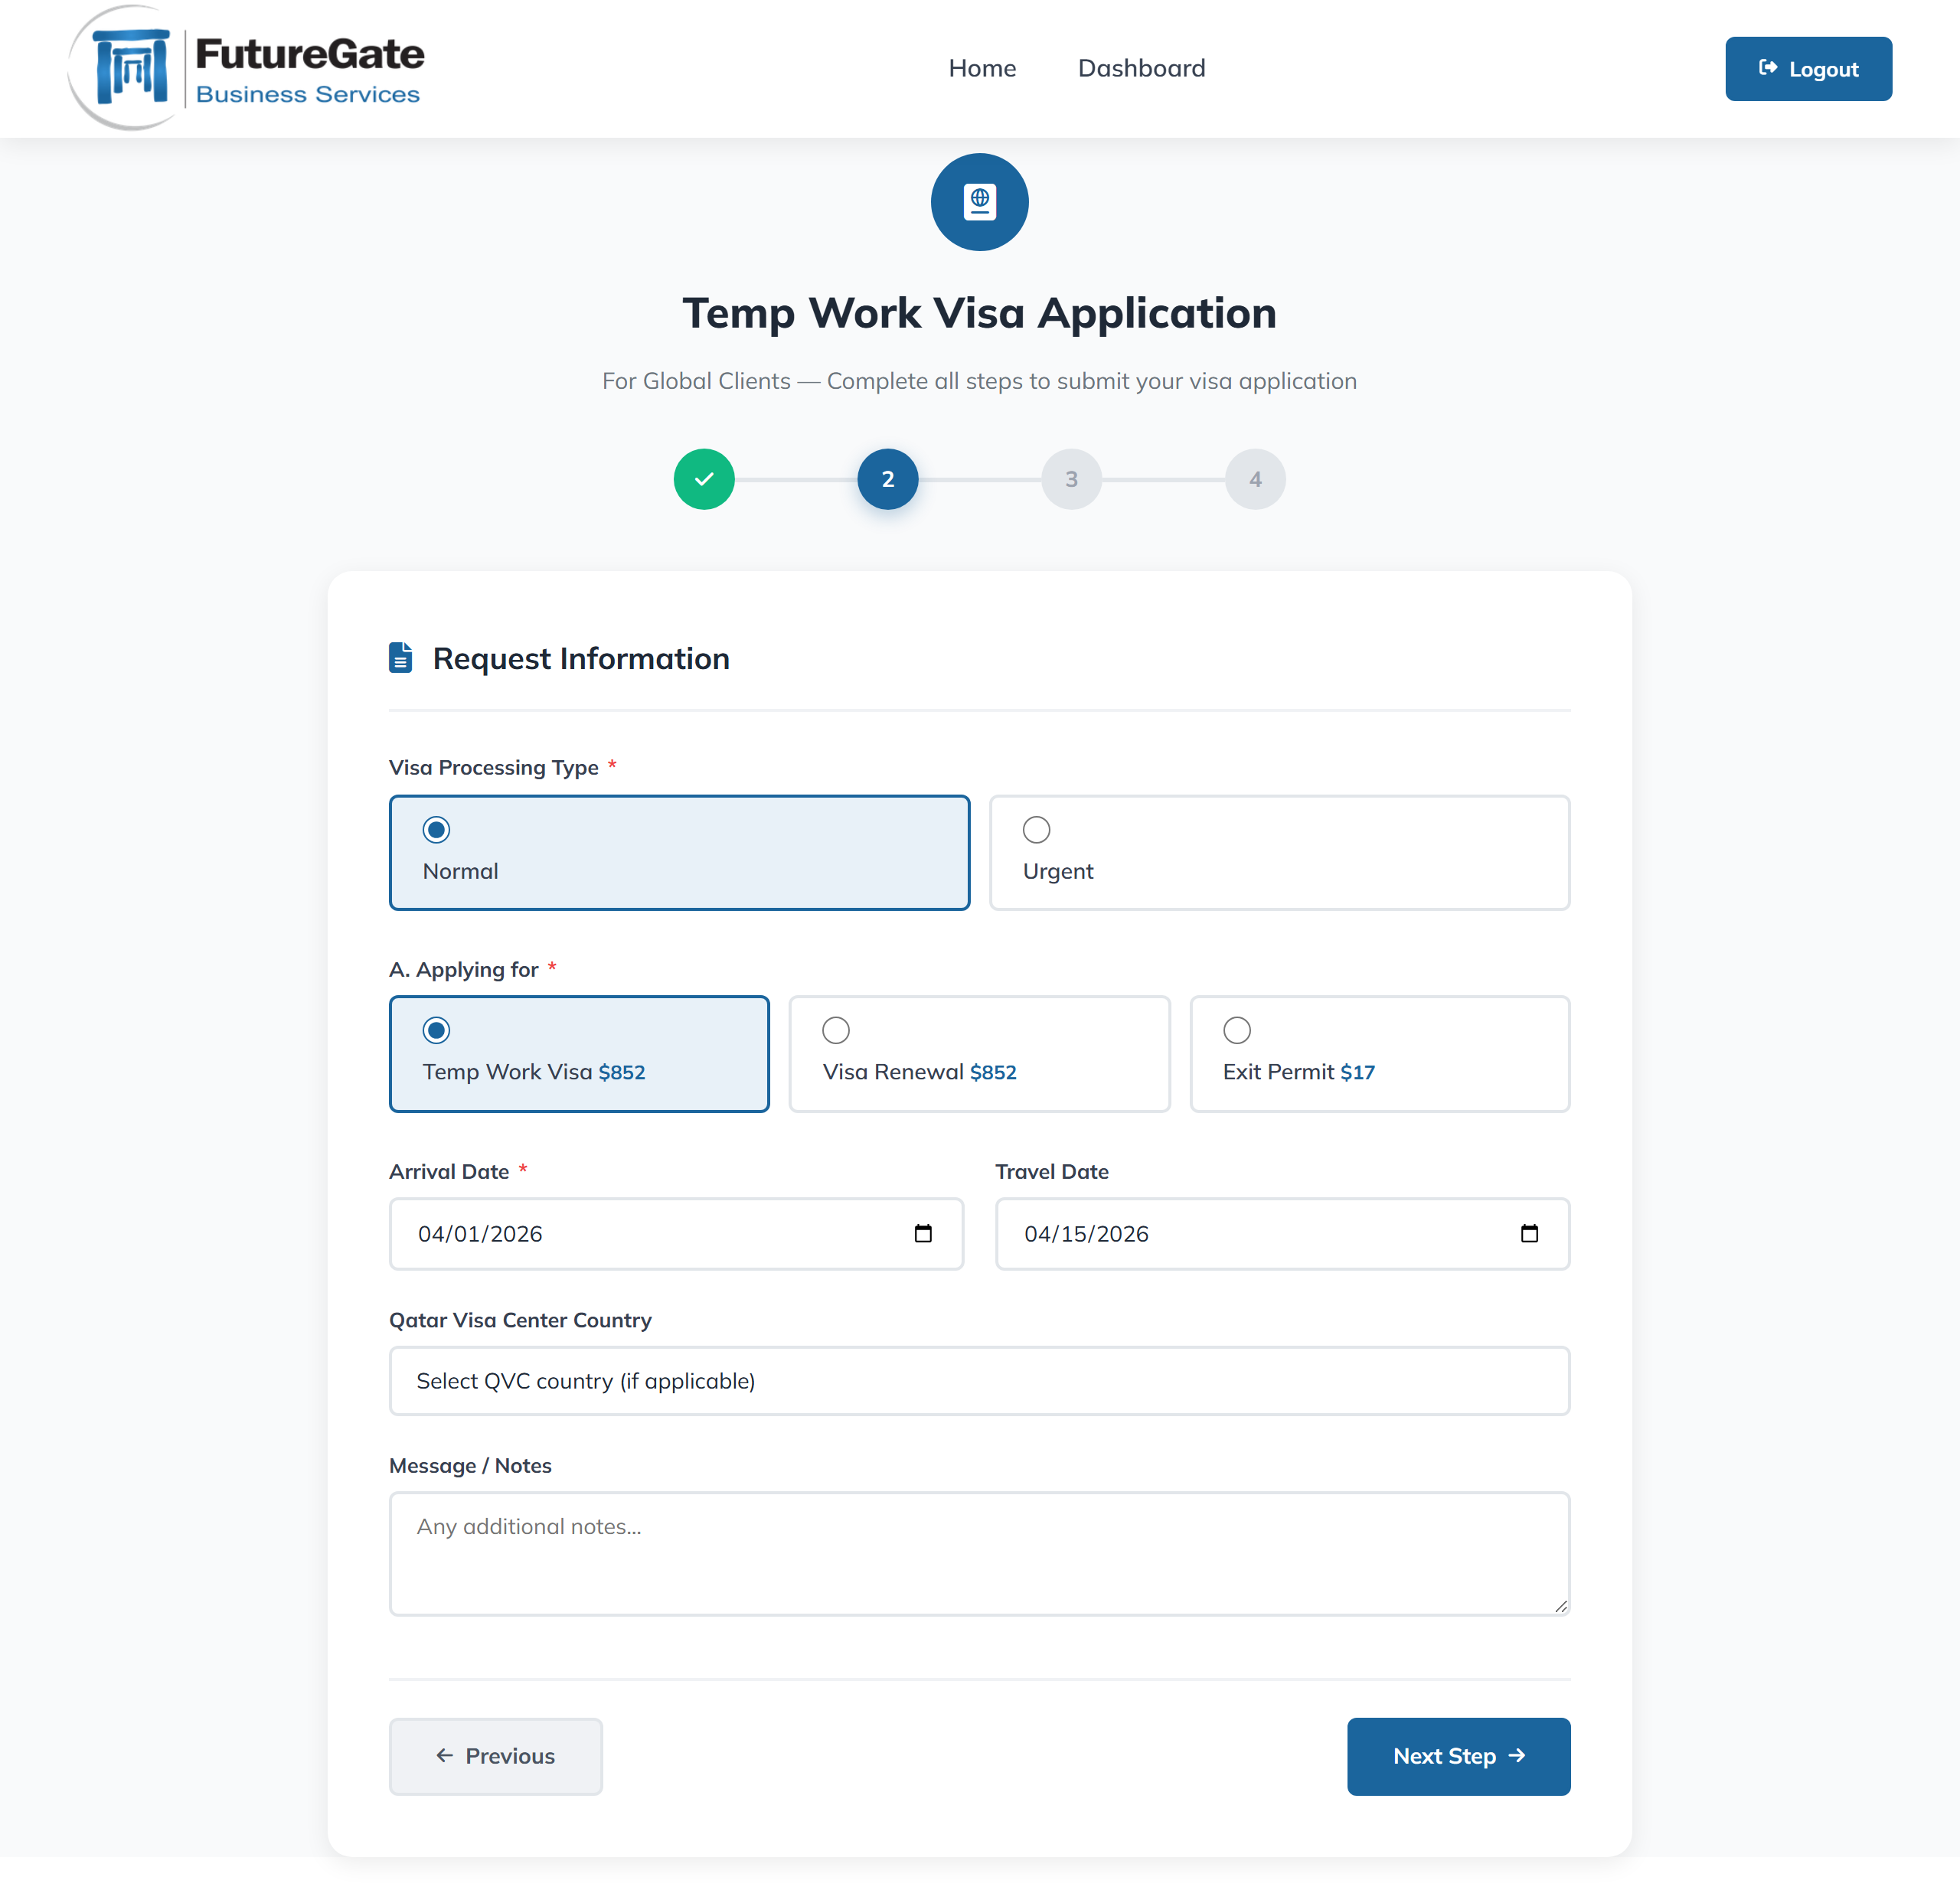
The visa application is a 4-step wizard. Here's a detailed walkthrough using the Temp Work Visa (Global Clients) form as an example. Other visa forms follow a similar structure.
Fill in the applicant's personal details:
| Field | Required | Description |
|---|---|---|
| Client / Employer Name | Yes | The company or employer sponsoring the visa |
| First Name | Yes | Applicant's first name (as on passport) |
| Last Name | Yes | Applicant's last name (as on passport) |
| Yes | Auto-filled with your login email | |
| Phone | Optional | Contact phone number |
| Gender | Yes | Select Male or Female |
| Nationality | Yes | Select from the dropdown list |
Click "Next Step" to proceed.

Specify the visa request details:
Pricing: Prices are displayed next to each option. The total is calculated automatically and shown on the Review step.
Upload the required documents for the visa application:
| Document | Required | Format | Max Size |
|---|---|---|---|
| Passport Copy | Yes | PDF, JPG, PNG | 2 MB |
| Education Certificate | Optional | PDF, JPG, PNG | 2 MB |
| Photo (Passport-size, blue background) | Yes | JPG, PNG | 3 MB |
Click or drag files into the upload area. The file name will appear once uploaded successfully.
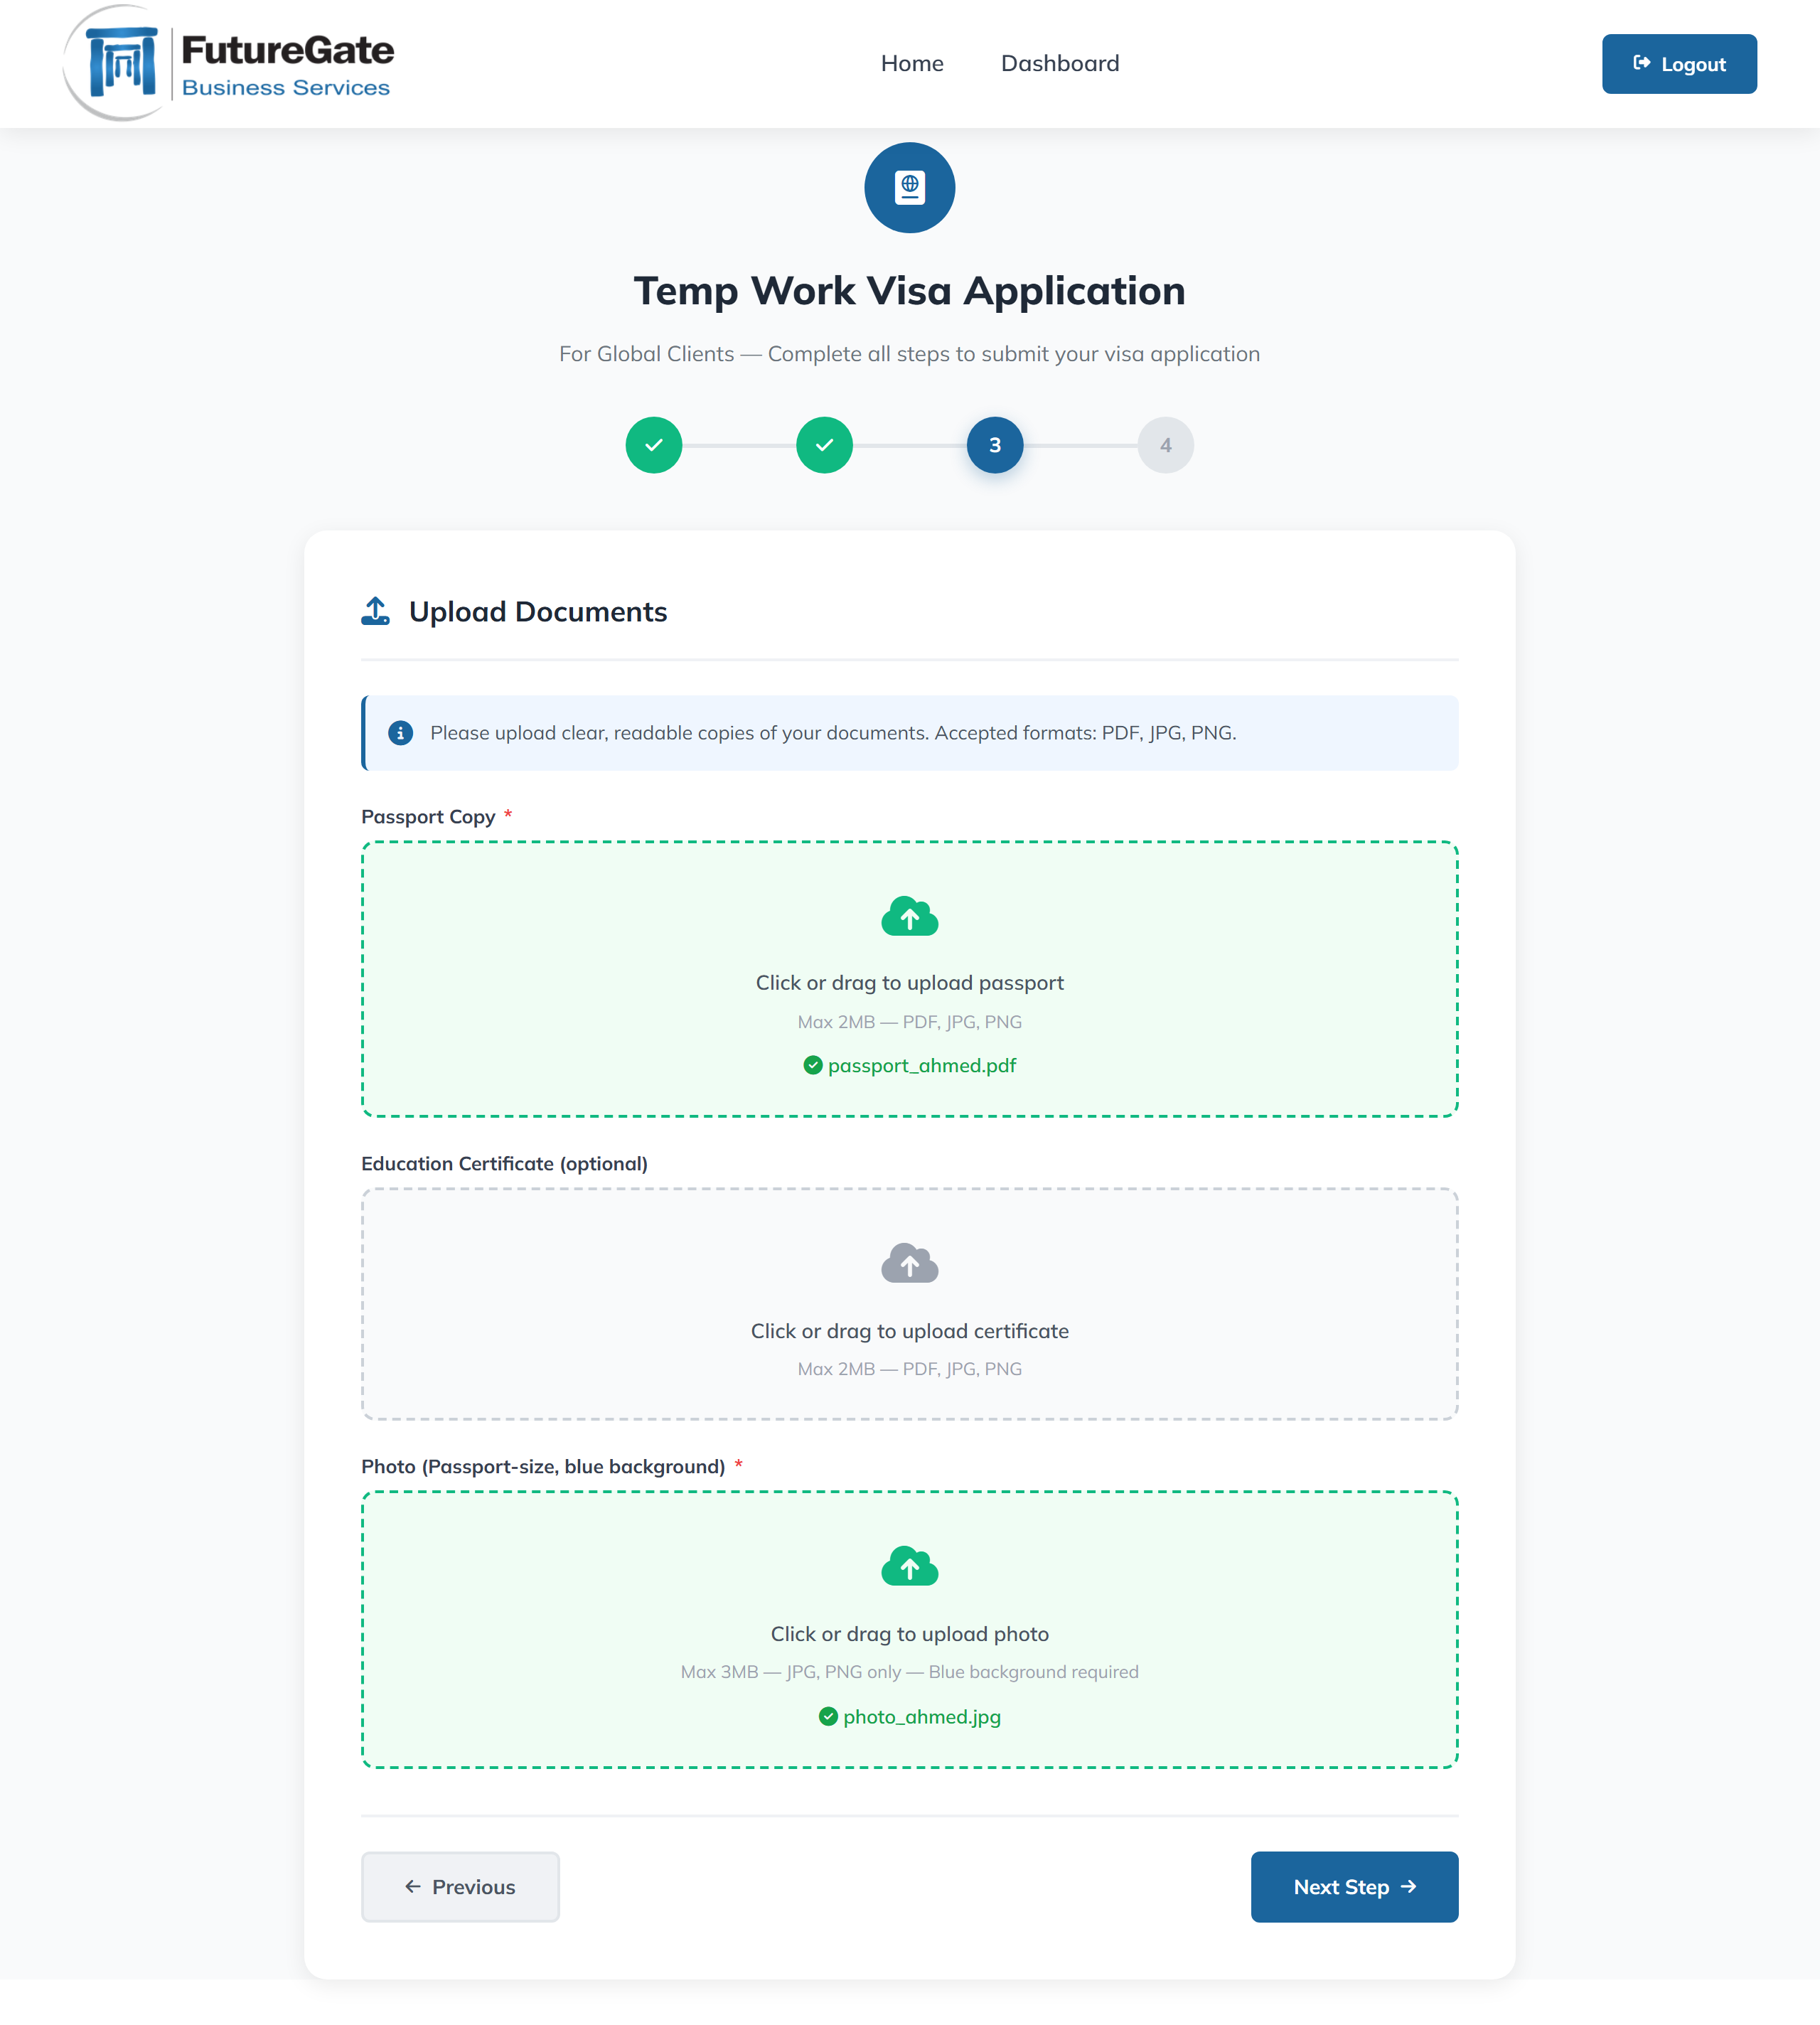
Photo Requirements: The passport-size photo must have a blue background. Ensure the image is clear and high quality.
Before submitting, review all the information you've entered:
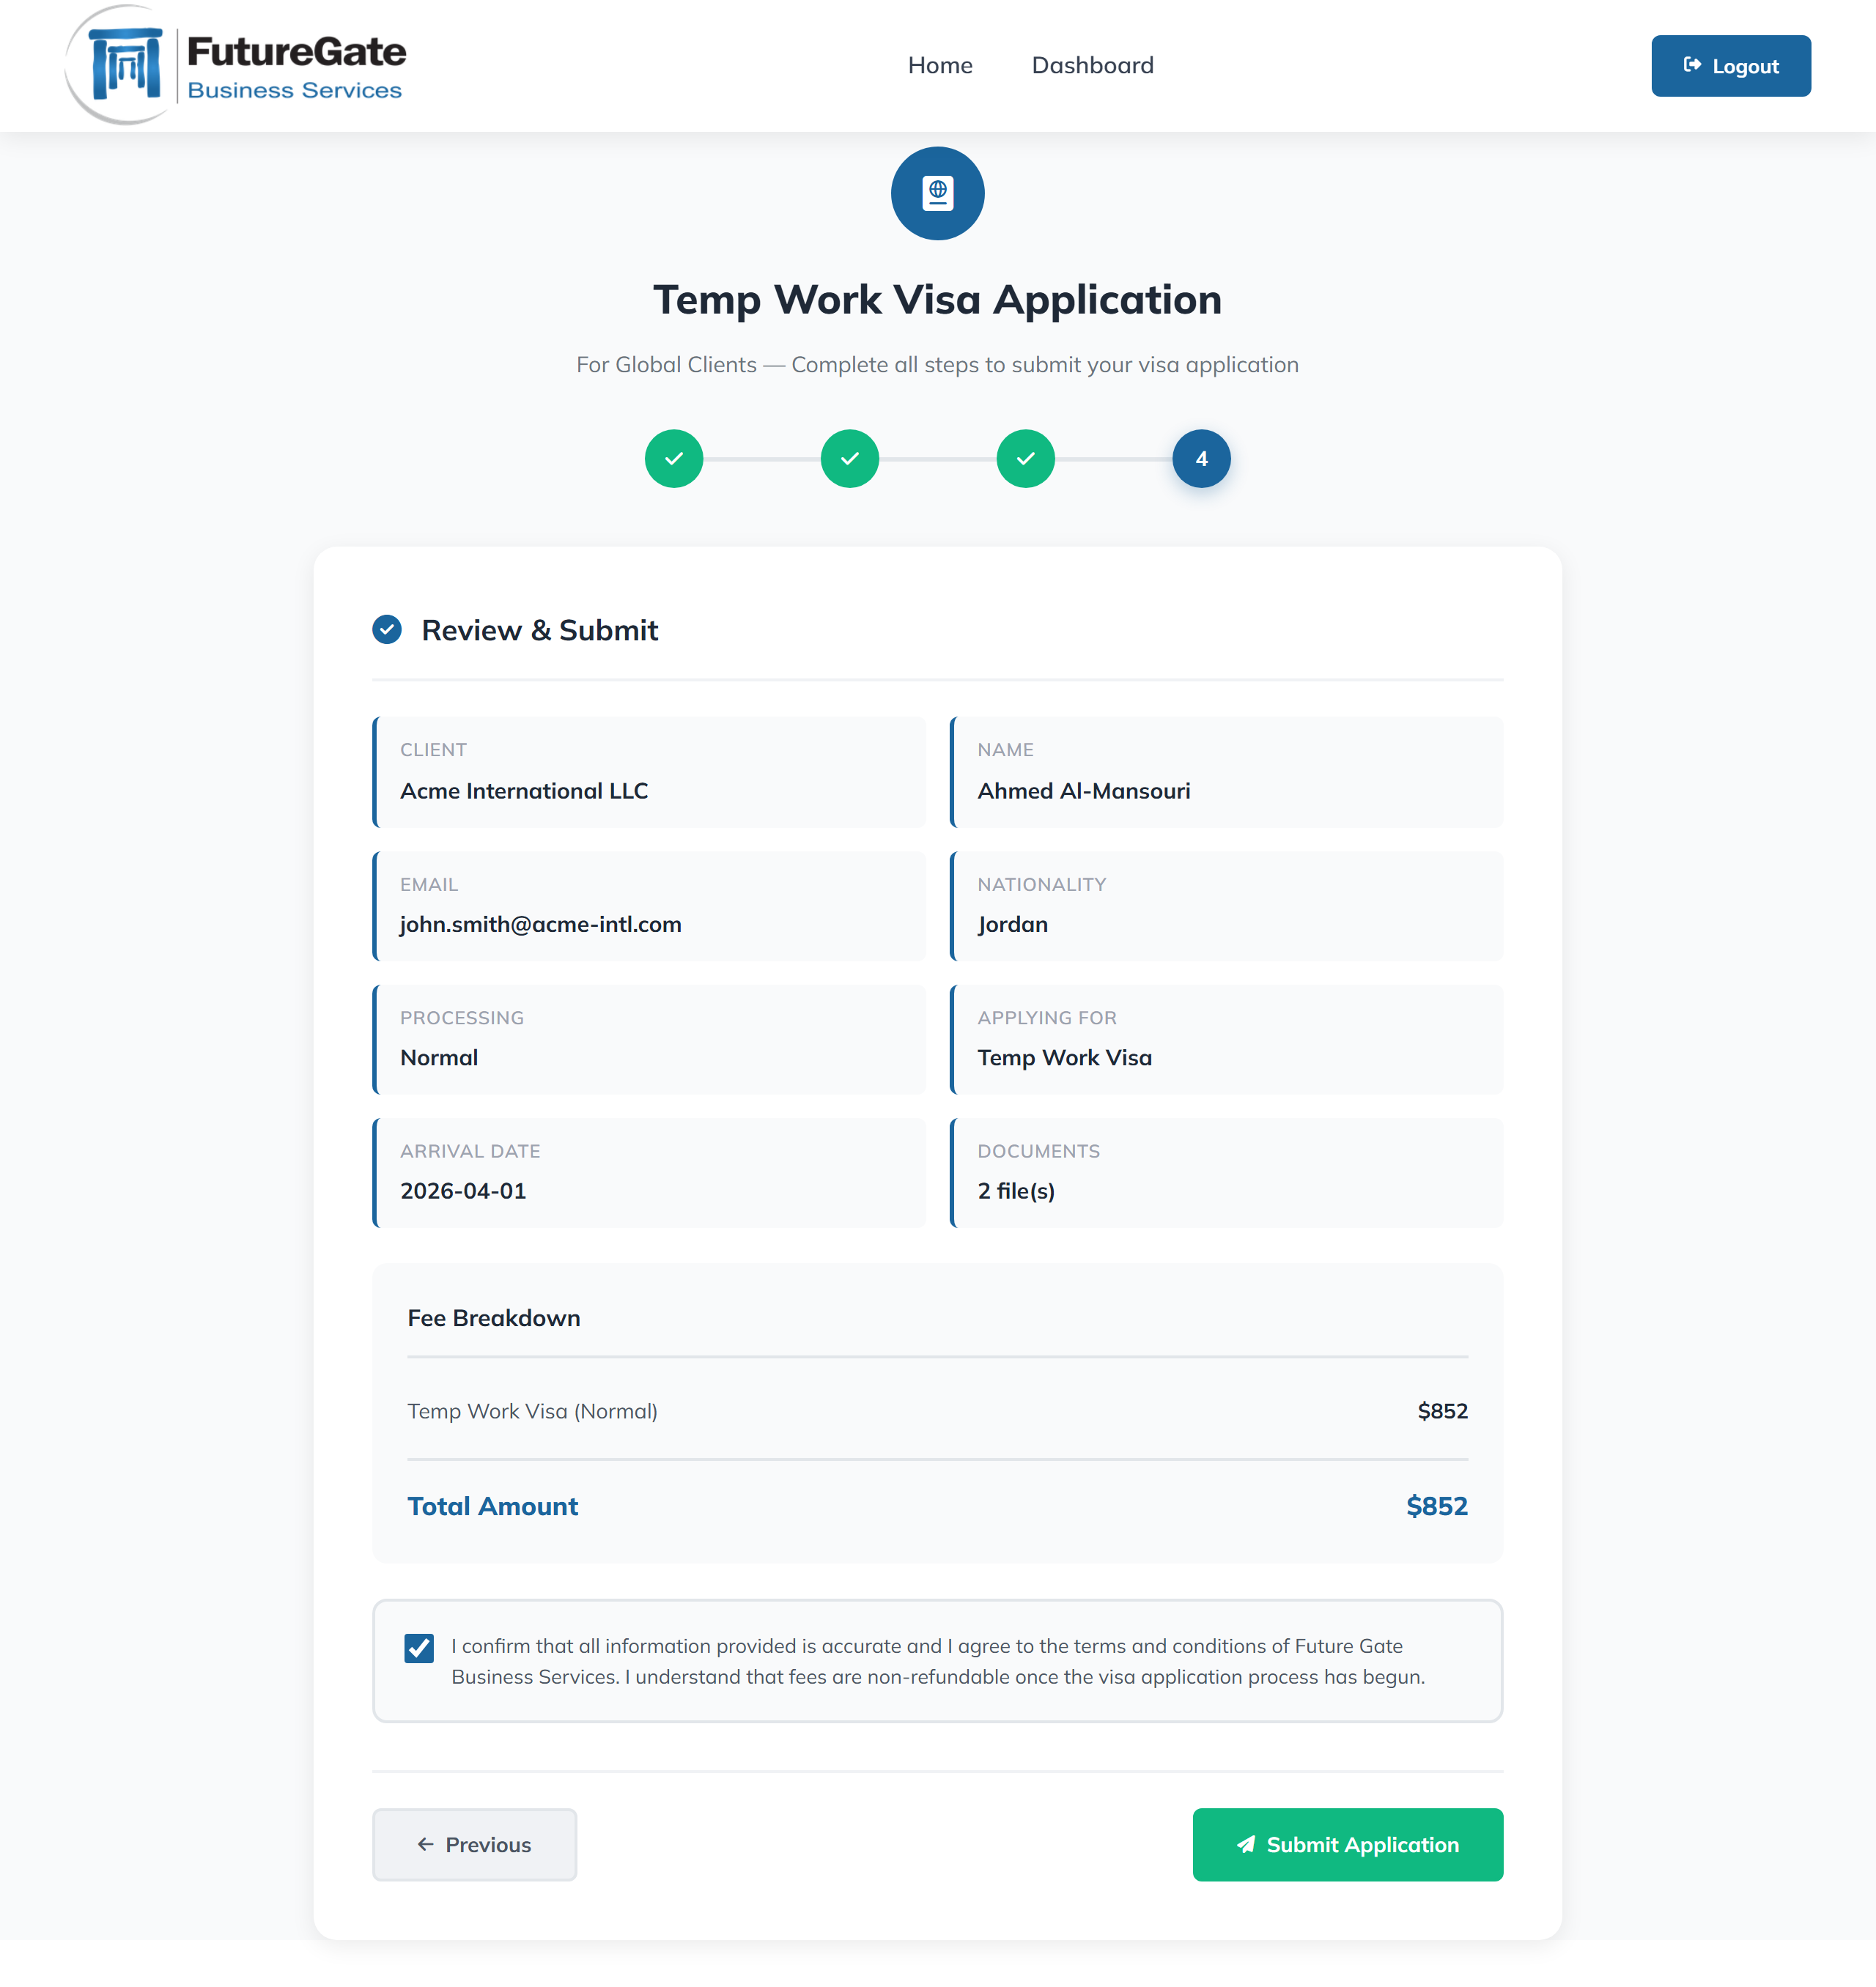
After Submission: Your application will appear under "My Submissions" on the dashboard once it has been processed and marked as paid. You can click on it to view the full details anytime.
All your completed and paid submissions appear in the "My Submissions" section on the dashboard.
Each submission card shows:
Click on any submission card to open a detailed view. The detail overlay shows:
Click the X button or click outside the overlay to close it.
The "Your Documents" section displays all documents assigned to your company by Future Gate.
Use the dropdown filter at the top of the section to view documents by category:
If you have download permissions, each document card will show a download icon (). Click it to download the file.
Privacy: You can only see documents assigned to your company. Each client's data is fully isolated — you cannot view other companies' documents.
At the bottom of the dashboard, the "Your Profile" section displays your account information:
To update your profile information, please contact your Future Gate administrator.
The portal supports both English and Arabic.
Your language preference is saved in your browser and will be remembered the next time you visit.
If you encounter any issues or have questions about the Client Portal, please don't hesitate to reach out:
| info@futuregate-qa.com | |
| Phone | (+974) 4467 7801 |
Our team is happy to assist you with account setup, permissions, or any technical issues.